
"There is a crack, a crack in everything, that's how the light gets in" ~ Leonard Cohen, song: 'Anthem' from the album 'The Future'
Just in case you don’t feel like binge-watching Netflix one of these evenings but rather would like to enjoy a good glass of bubbly and experimenting with your camera, here is a little something 😀
It’s a great way to explore how to photograph in darkness and also play around with your camera settings.
We ended up using some of our photographs for postcards and others for our Apple TV screen saver. Whatever you chose to do with your little creations this little fun experiment is certainly going to bring insight to how differently the human eye sees light/darkness in opposite to your camera’s. It certainly is insightful.
Set up
You will need a tripod, a fully darkened room, one continuous light source (such as a flashlight or a led light), a mid-range lens and of course your camera. We used a Canon EOS 70D camera, an EF-S 18-55mm, f/3.5-5.6 IS STM lens and an aluminum Alta Pro Vanguard tripod.
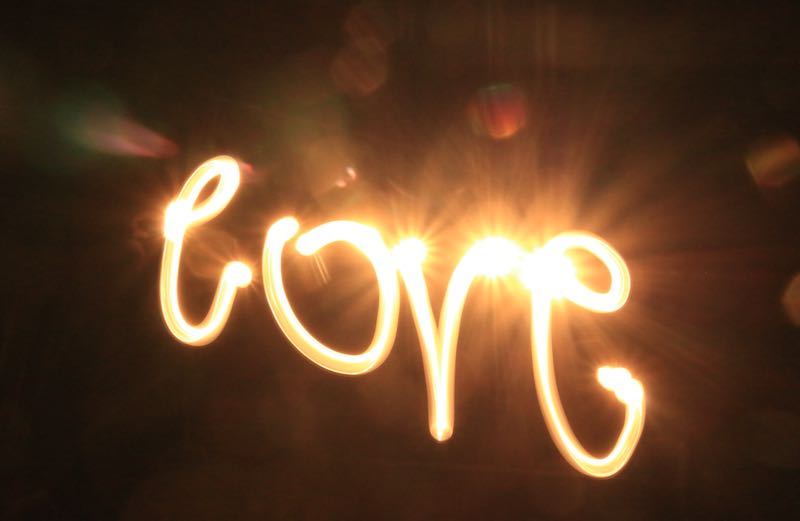
Furthermore, if you want to write a word, like we did, you will either need to know exactly how you can write it in the air – with your light source. Or write it on a piece of paper that another person holds behind the camera and you then write out in front of the camera.

Let’s start with writing in the air. This was one continuous move. We used an old-fashioned warm white flashlight with adjustable light strength.
The details:
Aperature value: 9 | Exposure time: 30 seconds | Focal length: 28 mm | ISO: 2.500 | F number: f/22 | Metering mode: Spot
You will immediately notice the difference: brightness and bokeh. This is definitely due to the light source but also the way we moved the light: we did each letter individually (so switch on the flashlight, write a letter/switch off the flashlight/keep hand steady!/switch on the flashlight, write a letter/switch off the light/ keep hand steady! etc) and not in one fluent continuous move as the previous one.
The details are the same as above.
Which one is more difficult? We thought the lower one. Having a person hold the paper and another write out what they see 2 meters away in complete darkness is not easy. But holding your arm steady and constantly switching on and off the flashlight – and getting it all done within 30 seconds – and not shake, pfffffffffff!… That was really pretty hard.
It was great fun to do though and so was the bubbly 😉
If you are looking for a somewhat easier set up, you can just take an object, place it on a steady surface and light it from an angle for a dramatic effect.
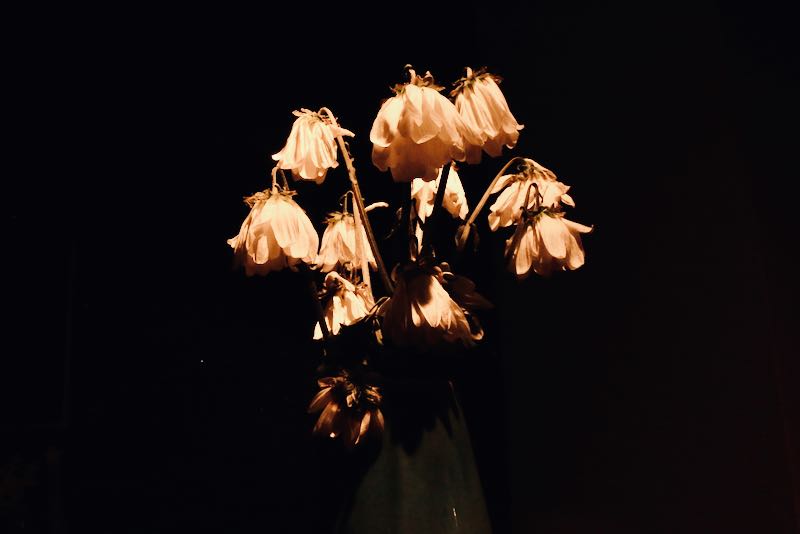
Since we prepared for this session, we had a few ‘props’ ready and one of them were these wilted daisy flowers. We placed them in a glazed, dark turquoise vase and arranged them in hight and size. We used a color HUE light to cast an angled light.
We wanted the scene to look dramatic yet romantic.
The details:
Aperature value: 9 | Exposure time: 4 seconds | Focal length: 23 mm | ISO: 2.500 | F number: f/22 | Metering mode: Spot
Note: Processing of the photographs was kept to a minimum and included: cutting and light balance modification.